Something

Google+
Loading
random musings
Showing posts with label diy. Show all posts

April 21, 2012

A new addition!

No, we're not preggers. Last weekend month In February, the bf and I installed a new range hood.

don't you just love how the cabs, backsplash and range are each just a bit off from each other?

The previous model was from 1984 (we found a receipt taped to it!) and mauve. It was also so coated with grease that when I attempted to scrub it clean, the paint came off too!

We pretty much followed the directions in the box, but complexity was introduced in two areas. First I converted the hardwired unit into plug in. Now I am sure there are many, many ways to do this. I took the easy way out and bought a plug kit at big blue:
I think it cost around $8??

Second, this was a replacement, not a new install. Now, in some ways, it was easier because we didn't have to install any duct work. However the age of the previous hood meant that things didn't line up perfectly. Specifically, the duct was cut to fit lower into the range (new versions use a collar and damper) for the fitting. Our solution was to add a couple spacers, which only lowered the range by 3/4". No biggie.

Even though the range comes with a bunch of sheet metal screws to attach the collar to hood, there are still a bunch of gaps. I used  HVAC Grade Duct Tape , which is not the same as regular ole duct tape. Don't use regular duct tape -- it is not rated for this type of application!

Well, I finally got around to dealing with the ugly space.
To cover the gap, I bought two square dowels to fit the space and attached 'em with some glue caulk.

March 31, 2012

How to fill a big hole (with wood filler)

So we're in the process of rehabbing the kitchen, slowly. Directly to the left of my (gas) range is where the original wall oven unit used to be. I know there used to be a wall unit because my neighbor has the same kitchen and his is still functional. Some previous owner replaced the oven/cooktop with a range. The oven space was converted to countertop, which I suspect is a huge improvement in functionality compared to the original (no counters directly adjacent to the cooktop - what were the builders thinking?). Whomever did the upgrade was pretty sloppy - none of the cuts were straight... and there was a chunk missing just to the left of the range hood (which we are in the process of replacing).  See?


If I used wood filler alone, the suff would fall back into the hole. What I needed was a way to provide support for the filler....


After filling and sanding (and a little painting). Obviously it needs more work, but a step in the right direction!


HookingupwithHoH

March 24, 2012

The inside of my closets

No, this is not a post about organization. It is one about creating extra storage.

First, the den. Here it is in the original-ish state:


And then I framed in a couple closets to flank the fireplace:


Which I shared with you here. The dirty little secret was that these closets were absolutely.empty.  No shelves, no hooks, no closet rods. Not very useful closets, right?

Now:


I installed two upper shelves and closet rod, and in the case of the right-hand closet, a lower set of shelves. The carpet in this room does not extend to the nooks, so I had installed a laminate floor in the first part of closet creation. To hold the curtains to one side, I just used those cheapie picture hangers. ($2.99 for a pack of 5). Here's what they look like:


The band of fabric just hooks on.

Technically this is a den (it's right off the kitchen and opens to the backyard). However, we find it's useful as a guest room, because it's close to the powder room and on the opposite end of the house from our bedroom, which is nice for privacy. When the basement is finished (ha!) it will be closer to the guest shower than any other bedroom. Some of our relatives have trouble with stairs so a main floor guest area that is not part of the main living area is really appreciated.

Oh, and by the way, I cleaned the fireplace. Much better, no?


Price breakdown:

2 closet rods: $10
2 sets closet flanges: $5
boards for shelving ~~
  • cleats: $6
  • upper shelves: $15
  • lower shelves: boards on hand + $5
paint, stain and caulk: free, already had
picture hooks: free, already had

Total for this project: $41

Pretty good for 6 solid wood shelves, no? The cost is approximately the same as for the cheapest wire shelving and it looks exactly like I want. Per The Sagulator each shelf can hold about 90 lbs of stuff without visibly deflecting. I figure that if this room ever turns into a hobby room or play room, those closet areas can be fitted with even more shelving without too much work - all without intruding on living space.


Running total for this room interior: $420 + $41 = $461
See more posts about the den here

Linking up to:

"Best DIY Projects of March" via beneathmyheart.net

DIY Show Off

March 3, 2012

Guest Bedroom Reveal

Before:


The upstairs guest bedroom is a pretty small space and gets lots of morning light especially in the summer (those windows are east-facing). Its major redeeming quality are the hardwood floors.  For reference, the door in the first and second pics are the same one - access to a tiny walk-in closet.
One drawback:  that ceiling fan. See how there's a dangly stem above the motor housing and big ole' lights below? Now, don't get me wrong - a ceiling fan in a second-story room on a hot summer night? Brilliant. But this one I could easily reach without stretching (I'm 5'2"), and it made a short room feel entirely claustrophobic. As in,  'when are those flowery frosted glass thingies going to fall on my head'   scary. 

And by the way, that closet? one little teensy 12" shelf.  Folks, this is a 40+ year old house! How can you live without either closet rods or shelves?


After:

Knowing that my budget was smaller than the room, my goals were two-fold. First to make the room seem livable - enough space and storage for all that people normally want in a bedroom, some way to control heat/light. Second to showcase that beautiful floor, since nothing else I could add would compete in quality.


Wall color: April Sky in Olympic Flat (this is a really light color that works well because my house has short walls and small windows. With newer construction I would go 1-2 shades darker on the paint swatch)
Trim color: Olympic semi-gloss base 2 with floetrol
Light fixture: Krylon ORB and Valspar frosted glass
Heat registers: Kilz Primer and Rustoleum semi-gloss white
Closet rods: Minwax


I'm not a huge fan of boob lights, but I am cheap. This one was originally residing in the hall, and after a few coats of orb on the metal bits and frosted glass spray paint on the dome (see more here), it looks pretty good for free!


The width of this closet  - less than 4' - meant that doubling the shelving/closet rods was an absolute must to increasing capacity (each one holds a mens XL fleece jacket with plenty of clearance). However because this closet is pretty much a square, there was space to add hooks along the right and left for longer items.


What I did / cost breakdown:

  1. Removed the surface wiring system (there were already four outlets in this room, one on each wall): free
  2. Added a battery-operated light to the closet: $13
  3. Painted ceiling, walls and trim: free, paint from previous projects
  4. Removed vinyl mini-blinds and installed two curtains, including a roman shade lined with blackout fabric: ~$75 for both layers, including curtain rods.
  5. Installed shelves, closet rods and hooks: $35
  6. Spray-painted heat registers: free, paint from previous projects 
  7. Installed a door stop: $3
  8. Removed the ceiling fan and replaced it with a boob light: free
  9. Replaced all the outlets/switches and covers with white ones: $5
                                                                           Total Cost: ~ $131

Work still needed:

  1. Install smoke detector done
  2. Add molding to and paint doors (satin white) or just replace the doors
  3. Hang art done
  4. Build/find/buy a side table
  5. (optional) build a headboard
  6. Bring in the dresser from our room (originally in downstairs guest room)
  7. (optional) Find a better rug
  8. Find an oscillating fan that looks nicer.
  9. Add hooks or full length mirror to inside of closet door

February 25, 2012

A workbench

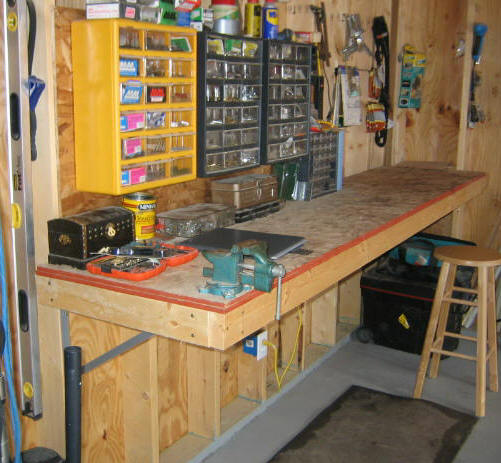
In my parent's home Dad had a gorgeous workbench. It ran half the width of an oversized two car garage and was deep enough to store jars of nails and other fasters while still having space to work with. To this day I can't remember Dad actually using it.

Fast forward to now - I have a big (top secret!) project in the works and an in desperate need of a workbench. Of course, my workshop setup isn't ideal - the basement floor - so I'm thinking good prep would be to make my own workbench.  In my dreams I'd (re)create the luxurious bench that Dad had. But considering the basement area I'm working in now will eventually get finished, and all my woodworking tools will get banished to a smaller dank corner of the basement, I really need something that can be maneuvered through a standard door opening. My thought is something like this:


with final dimensions of 48"(L) x 24"(W) x 34"(H). If all things go well, I'll make another one on casters with shorter length, say 24". That way I can set them up next to each other for bigger projects for one to act as a feed table or for use with sheet goods.

Last weekend I made the first one! I'm combining the pics above with the plans for this bench from  ana-white.com as well as inspiration from wayneofthewoods.com


Shopping List:
6 @ 2" x 4" x 8'
wood screws

Cut List (all 2 x 4):
8 @ 33" - legs
2 @ 20" - bottom shelf supports
4 @ 44"- stretchers
4 @ 10 3/4"- upper supports

Not on list:
scrap wood for shelving material (14" lengths, 10 pieces)
16" x 48" x 1"osb (rated for subflooring)
6" x 48" x 1 " whiteboard

The final result isn't pretty, but definitely functional. I pieced together the top from a few scrap pieces of osb and other wood I already had on hand. The reason for combining the three plans is to avoid the 90-degree legs which are common to ideas from the ana-white site and make use of sheet goods I already had. The bulk of two 2 x 4's (or one 4x4) makes for a sturdier base. And this sucker is sturdy. I climbed all over it without feeling any deflection, and although it is entirely possible for one person to move it, two sets of hands and backs makes the job much much easier.


Ways to turn this into and even better workbench:

  1. add locking casters for portability (will probably add this when I make the second unit)
  2. a second "sacrificial" layer of material for the top for durability.
  3. an extra shelf support higher up as a place to store my clamps (need to build up more scraps first)

five days five ways  feature friday free for all